Showing posts with label fireplace. Show all posts

November 15, 2010

We used one of our Fire Starters over the weekend.  A couple of weeks ago, we made them from common household items.


017019


They work great!  To quote the great American hero John "Hannibal" Smith; I love it when a plan comes together.


What simple project have you found satisfaction in?

Read More

November 1, 2010

My wife has a knack for lighting fires, and I don’t.  There, I said it.  As a man, this is embarrassing. It’s made worse when she mocks my lack of fire-starting ability.  Don’t get me wrong; I can get a fire going.  But it takes a little effort.  And if a little effort doesn’t work, I may, on occasion, resort to using a little gasoline.  Ssshhhh don’t tell. 

Well, those days are behind us, now!  Or so I hope.  I came across this great DIY page on making fire starters from stuff around the house, and so I’ve been setting things aside until a good time to do it presented itself.

Over the weekend, Jessie (who was of great aid in the kitchen) came by so we could catch up on each others lives, and I decided that a great thing to do while we talked would be to make a batch of fire starters for the winter.

I went in the basement and collected a bunch of dryer lint we’d set aside, and then lined a cookie sheet with wax paper. 
Making Fire Starters 011Making Fire Starters 012

I didn’t want the wax to damage the pan, and it made cleanup easier.
Then, we shoved the dryer lint into the carton with some fragments from the carton lid.  We melted the wax (candle chunks) by cutting an empty 2-liter bottle in half and placing it in a pot of boiling water with the wax inside it. 


Making Fire Starters 014Making Fire Starters 010

Once a good amount of the wax had melted, we poured it on top, trying to let it seep into the lint as much as possible.  Once we had poured as much as it would take, we let it cool, and we’re done! 


Making Fire Starters 015Making Fire Starters 016

I’ll follow up once we use one and find out how well it works.  This was a first-attempt, and I suspect that they will get better over time.
Read More

October 4, 2010

We finally got around to hanging our wedding picture and some sconces up above the fireplace.  Also, time for the first fire of the season!


Read More

December 15, 2009


When we were going through the house w/ the home inspector, I asked him if I'd need a chimney specialist to determine if there was any degredation.  He looked up with the flashlight and said it looks remarkably clean.  Later, the owner told us that they had never used it.  Not once.  And they moved in in 1963.  Further, she said, the owners before them had never used it either!  Apparently, the house has cedar shingles at the time, and they were afraid some ember would start the house on fire.  Well, we'll be breaking that trend.


First, though, we've got to do something about that look.  White walls, white brick.  Who paints brick? 

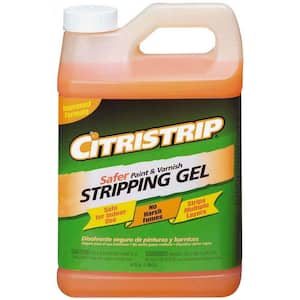
After some online research (of course) I determined that sandblasting might be overkill for this, and it could damage the brick.  We wanted to avoid any harsh chemicals, as we don't like using them on principle.  We bought some citrus-based stripping gel and started with that. 


The citrus-based stripper

The carbon brush wheel

After brushing it on and letting it sit overnight, I attacked it with a scraper.  I got some chunks off, but obviously this was not going to get it out of the grit of the brick to the level we wanted.  So I bought one of these carbon steel brush wheels and a new Dewalt corded 1/2" drill to turn it with.  Oh, and a dual-filtered breathing mask, because this was going to put a lot of paint dust and brick residue in the air, and I don't want me or the wife breathing that in.  Oh, speaking of dust in the air...

I put a sheet of plastic from floor to ceiling to encase the living room.  It has a very ET feel to it.  "Elllll--eeeeee--ooooot?"

This was a good move.  There was a LOT of dust.


Stopped for a progress shot.  You can see where the citrus stripper has removed chunks of paint where the brush wheel hasn't been yet.  But the best part is, of course, that the wheel is getting the brick to the distressed look we are after.  Unfortunately, it's also wearing out that brush incredibly quickly.  We ended up going through 5 or 6 of them in total.  Once I had the technique down, I showed it to the wife, who is always sometimes willing to jump in on our ongoing projects. 


Read More
Powered by Blogger.