My wife has a knack for lighting fires, and I don’t. There, I said it. As a man, this is embarrassing. It’s made worse when she mocks my lack of fire-starting ability. Don’t get me wrong; I can get a fire going. But it takes a little effort. And if a little effort doesn’t work, I may, on occasion, resort to using a little gasoline. Ssshhhh don’t tell.
Well, those days are behind us, now! Or so I hope. I came across this great DIY page on making fire starters from stuff around the house, and so I’ve been setting things aside until a good time to do it presented itself.
Over the weekend, Jessie (who was of great aid in the kitchen) came by so we could catch up on each others lives, and I decided that a great thing to do while we talked would be to make a batch of fire starters for the winter.
I went in the basement and collected a bunch of dryer lint we’d set aside, and then lined a cookie sheet with wax paper.


I didn’t want the wax to damage the pan, and it made cleanup easier.
Then, we shoved the dryer lint into the carton with some fragments from the carton lid. We melted the wax (candle chunks) by cutting an empty 2-liter bottle in half and placing it in a pot of boiling water with the wax inside it.

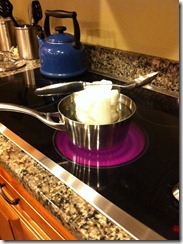
Once a good amount of the wax had melted, we poured it on top, trying to let it seep into the lint as much as possible. Once we had poured as much as it would take, we let it cool, and we’re done!


I’ll follow up once we use one and find out how well it works. This was a first-attempt, and I suspect that they will get better over time.
Read More
Well, those days are behind us, now! Or so I hope. I came across this great DIY page on making fire starters from stuff around the house, and so I’ve been setting things aside until a good time to do it presented itself.
Over the weekend, Jessie (who was of great aid in the kitchen) came by so we could catch up on each others lives, and I decided that a great thing to do while we talked would be to make a batch of fire starters for the winter.
I went in the basement and collected a bunch of dryer lint we’d set aside, and then lined a cookie sheet with wax paper.


I didn’t want the wax to damage the pan, and it made cleanup easier.
Then, we shoved the dryer lint into the carton with some fragments from the carton lid. We melted the wax (candle chunks) by cutting an empty 2-liter bottle in half and placing it in a pot of boiling water with the wax inside it.


Once a good amount of the wax had melted, we poured it on top, trying to let it seep into the lint as much as possible. Once we had poured as much as it would take, we let it cool, and we’re done!


I’ll follow up once we use one and find out how well it works. This was a first-attempt, and I suspect that they will get better over time.